Data Driven Testing
Screenster allows you to make your testing data driven. That means you can use your external data to extend your automated test cases.
Start with Data Driven Testing
- Record a test and extract parameters;
- Create the dataset for recorded test.
Screenster offers two options for adding dataset to the project. Let’s take a closer look at them so you can choose which one suits you best.
Upload file in comma-separated values (CSV) file format
Screenster allows you to upload prepared dataset from CSV file. When creating a CSV file that can be imported to Screenster, make sure that all fields are separated by commas.
Other dataset file requirements:
- Headers row should contain parameters’ names. Names cannot contain white spaces or dollar sign ($). Examples of a good parameter names: “input#username”, “user.email”, “mobile_phone”.
- The last name in header should be “expectedResult” (case insensitive). Possible expected result values: PASSED, ERROR, DIFFERENCES (case insensitive) – find information about test statuses here.
- The next lines should contain parameters values that will be used in test. Make sure that values amount matches names amount.
Sample dataset CSV file:
userEmail, userName, phone, age, expectedResult
testEmail1, testUser1, 12345, 20, passed
testEmail2, testUser2, 23456, 25, error
testEmail3, testUser3, 34567, 31, differences
Dataset uploading step-by-step:
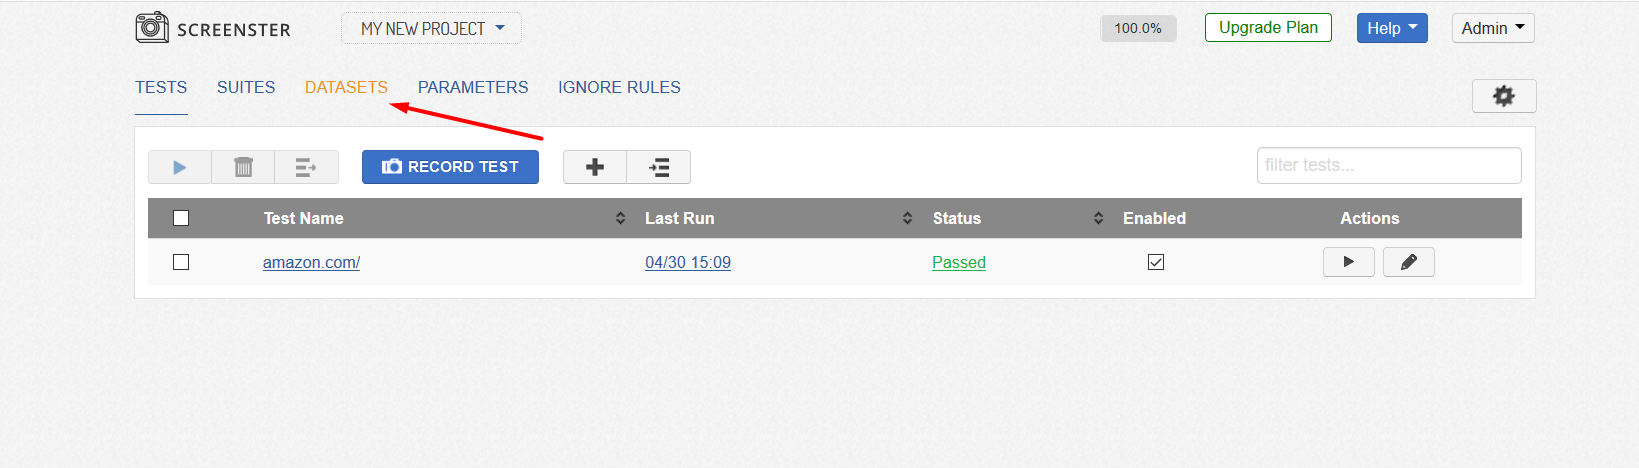
- Go to the tests view, and click on “Datasets” link:
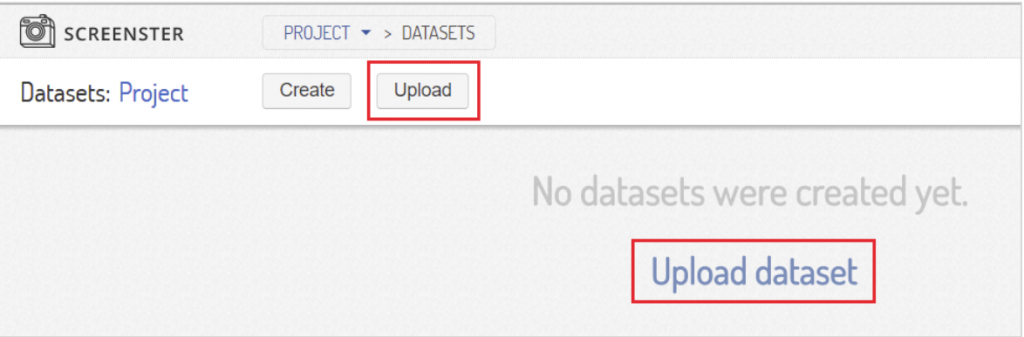
- Click on the “Upload” button or “Upload dataset link”
- You will see the form for dataset upload with short tips on the right side. Enter dataset name and chose your .csv file. (Note that dataset names must be unique for a project):
- Click save and Screenster will process you dataset and show it to you as an editable table.

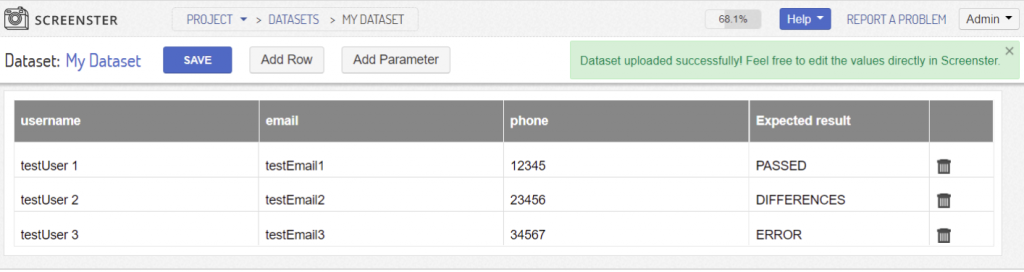
Now you have your first dataset on Screenster. You can edit it just like it described below for creating manually.
Create the dataset manually with Screenster
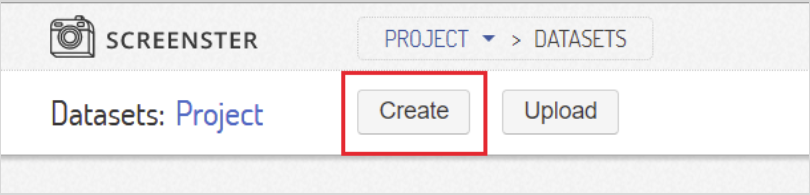
- Go to the tests view, and then to the datasets;
- Click on the “Create button”:
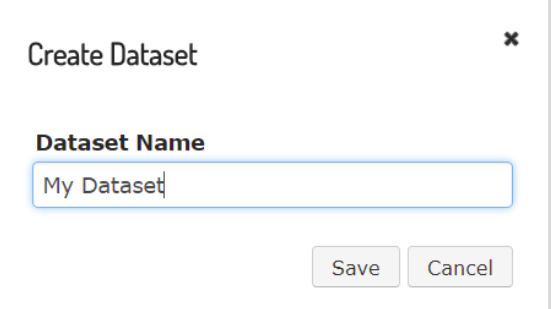
- Enter the name for your dataset and click “Save”:
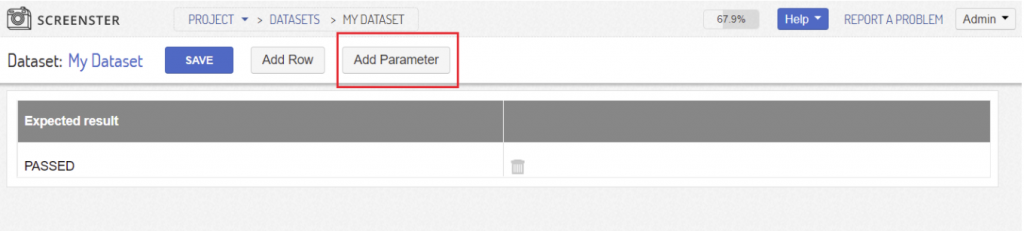
- You will see your new dataset with one row already created. It has no parameters yet – just default expected result: PASSED.
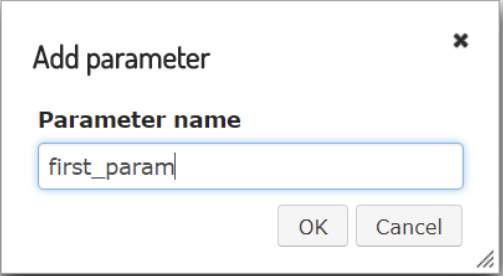
Now you can add parameters. Now click on “Add Parameter” button: - Enter parameter name. Make sure that the name is unique and doesn’t contain any white spaces or dollar signs ($):
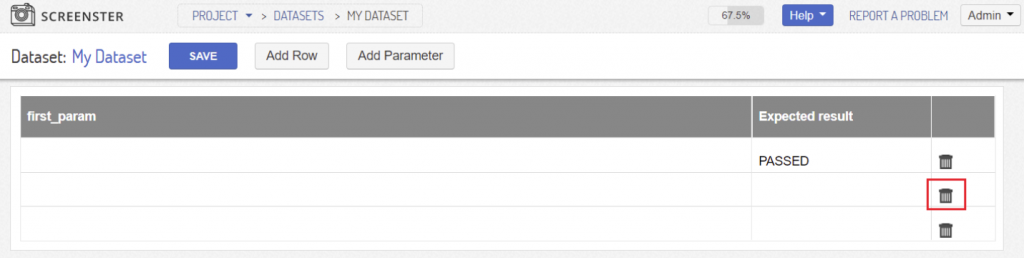
- Click “OK”. You will see success message and new parameter will appear in the dataset table. Each new parameter will be added as the last column of the table:
- To add a row simply click “Add row” button and new row will be added to the end of the dataset;
- Click on cells to enter new or edit existing values;
- Click on the trash icon to delete a row. It will be activated when your dataset has more than one row because empty datasets are not allowed in Screenster.

When you’re done with editing, you can leave this page – all your changes are saved automatically. Note, that if you leave expected result values empty, they will be set to default value (PASSED) after saving. Now your dataset is ready to be used in tests.
Run your test with dataset
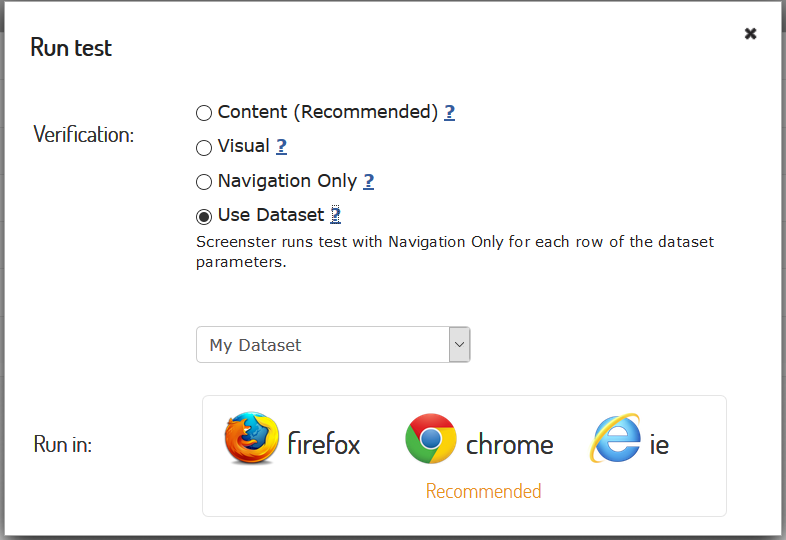
- Run your test as usual, pick option “Use Dataset” and select dataset that should be used:
- Then click on browser you want to use and Screenster will run the test as many times as many rows are in the dataset;
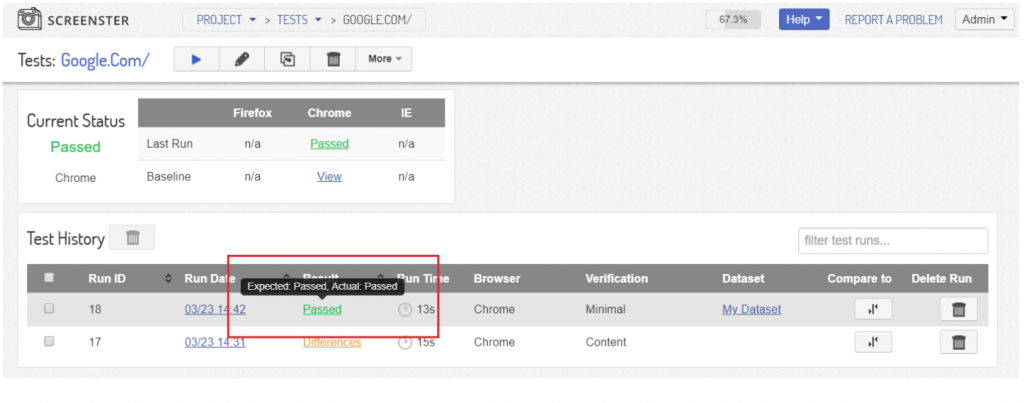
- Screenster will compare test result with expected result of the dataset row used in it. Test will be PASSED only if expected result matches actual result. Otherwise test status will be set to ERROR;
- Put the mouse over test result to see expected and actual values:
- Alternatively, you can click on the ‘Run’ button near your dataset and select the test you need to use it with.
You can also visit the Release History page to check what’s new and what has been improved in your current Screenster version.