CI Client
To use our CI client, download the screenster-ci.jar file to a directory on your CI server. To run your projects, add the following command invocation to your favorite CI tool:
java -Duser=<userEmail> -Dpassword=<userPassword> -jar <screensterCIFolderPath>/screenster-ci.jar <projectList>
where:
- screensterCIFolderPath – path to the folder with the unzipped Screenster CI client.
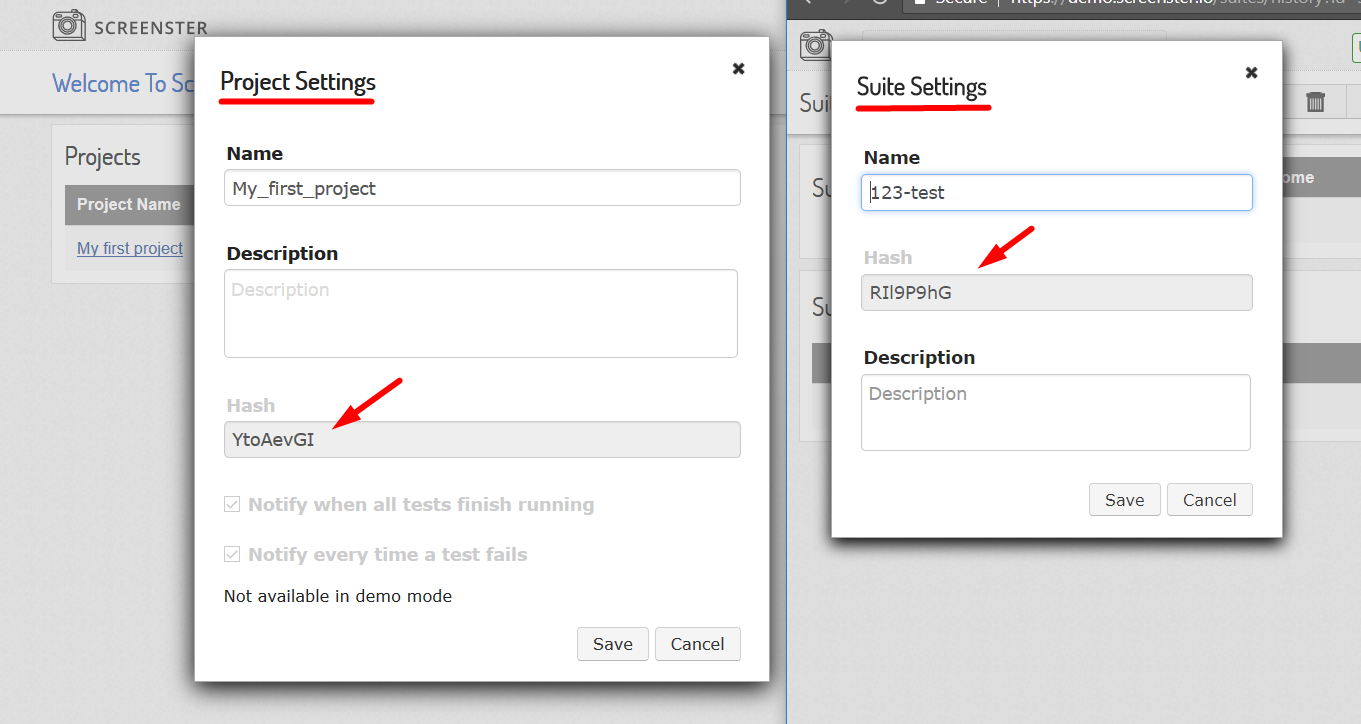
- projectList – the list of project hash codes (you can find them in project settings) separated with commas. Example:
48DaCx01,D3qQ4H75 - userEmail – user login to tests.screenster.com. Example: john.smith@acme.com
- userPassword – password of the account at tests.screenster.com.
Each project and suite is defined by a unique hash code which can be found in its settings:
Current version of Screenster CI Client requires you to provide project and suite hash codes, not their names. But if you are using the old one, you can still provide names in your commands: “MyProject1, MyProject2”. It is recommended to download and use the latest version of the CI CLient.
Also the optional parameters can be passed
- -Dbrowsers=<browsersList>
- -Dhost=<host>
- -Dtype=<project>
- -Dverification=<verificationType>
where:
- browserList – the list of browsers separated with comma, on which the tests will be run. Default value – chrome,firefox.
- host – the link to the running Screenster. Default value – http://localhost:7070
- project – by default you are executing selected Screenster projects with your CI jobs but if you set this parameter to suite, you’ll be able to execute selected suites instead.
- verificationType – verification type with the tests will be run. By default for project run Screenster uses default verification setting from each test. For suite run – content verification. Possible values: visual, content, navigation_only
.
For example:
java -Duser=john@acme.com -Dpassword=123456 -Dbrowsers=chrome -Dtype=suite -jar d:\ScreensterCi\screenster-ci.jar z8a9CxL2,43qm4H7h
In order to prolong your Screenster job on CI, you need to modify the following parameter in the CI file: -Dretries.count.
By default, it is set to 120 retry attempts. You can set it to be longer. For example, the following value:
-Dretries.count=180
will provide 3 hours’ time for your tests in this job.
Jenkins Example
- Create a “Run tests on Screenster” job
- Add build step named “Execute Windows batch command” and put there the command described above.
A generated report can be found in the folder named “reports” located in the ScreensterCI folder.
Travis Example
- Put Screenster CI client screenster-ci.jar into root directory of your repository next to .travis.yml file
- Update .travis.yml file by adding into “script” configuration block the command described above.
TeamCity Example
- Create a “Run Tests on Screenster” build configuration for your TeamCity project
- Add new build step with “Command Line” runner type and put into “Custom script” field the command described above.
Bamboo Example
- Create a “Run Tests on Screenster” build plan for your Bamboo project
- Add new “Script” task under “Default Job” of newly created build plan
- Select cmd.exe interpreter and put into “Script body” field the command described above.