Creating Visual Tests Manually
Recording tests is the easiest and fastest way to automate visual testing. This said, creating tests manually might seem like a better option in some rare cases. Cases like these mostly come down to testing a UI in the early stages of development.
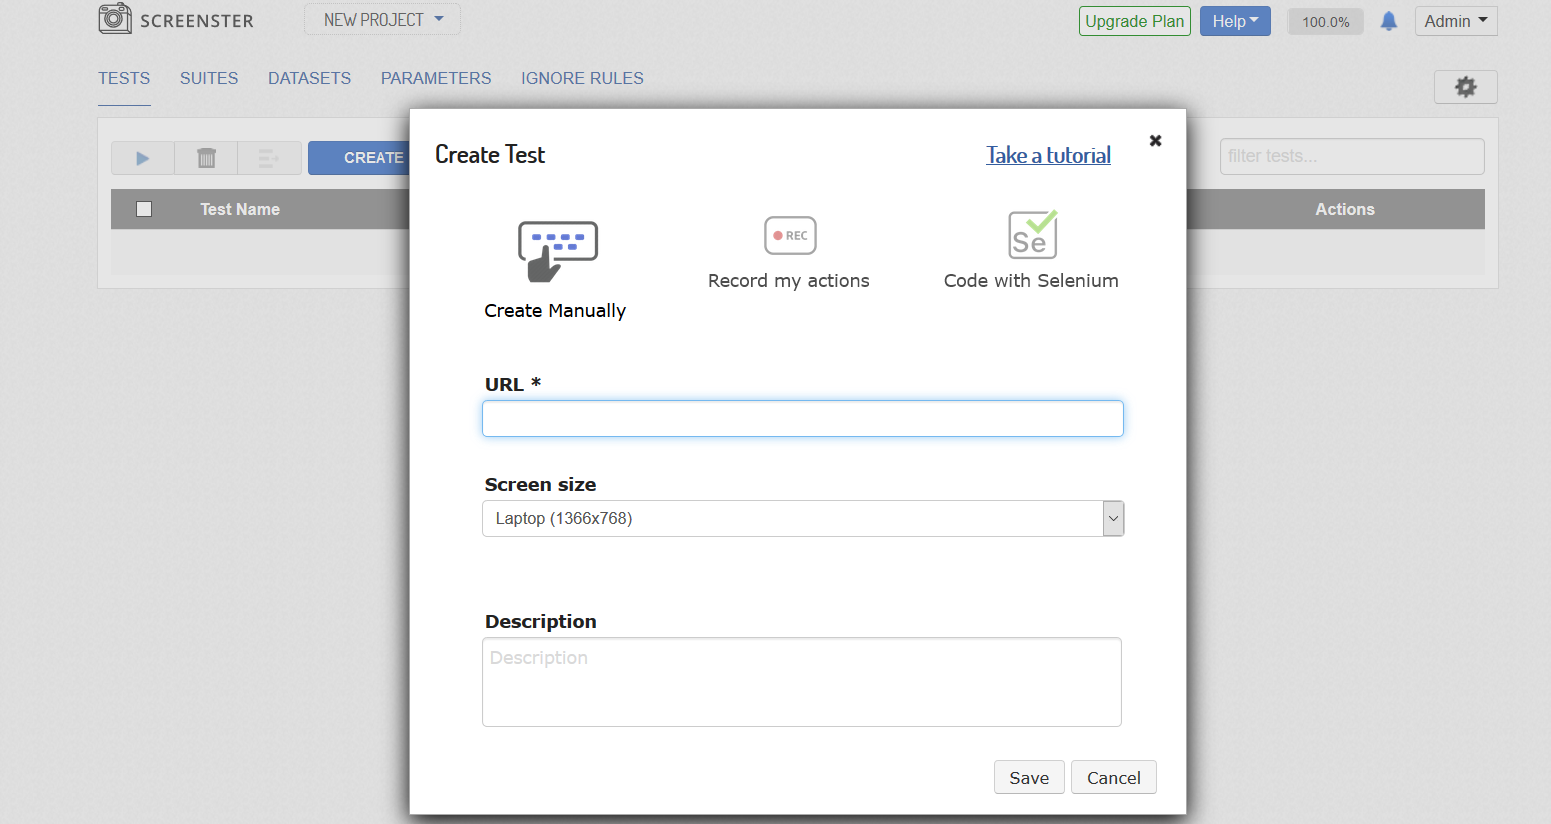
Here’s how you can do it. Go to the project menu, click on ‘Creat Test’ and select the ‘Create Manually’ option. This will trigger a popup window asking for test name and URL. Specify both parameters, click ‘Save’, and the starter version of your test is ready.
In the manual mode, Screenster automatically creates two test steps: Open URL and Close browser. You can extend your test by adding new steps.
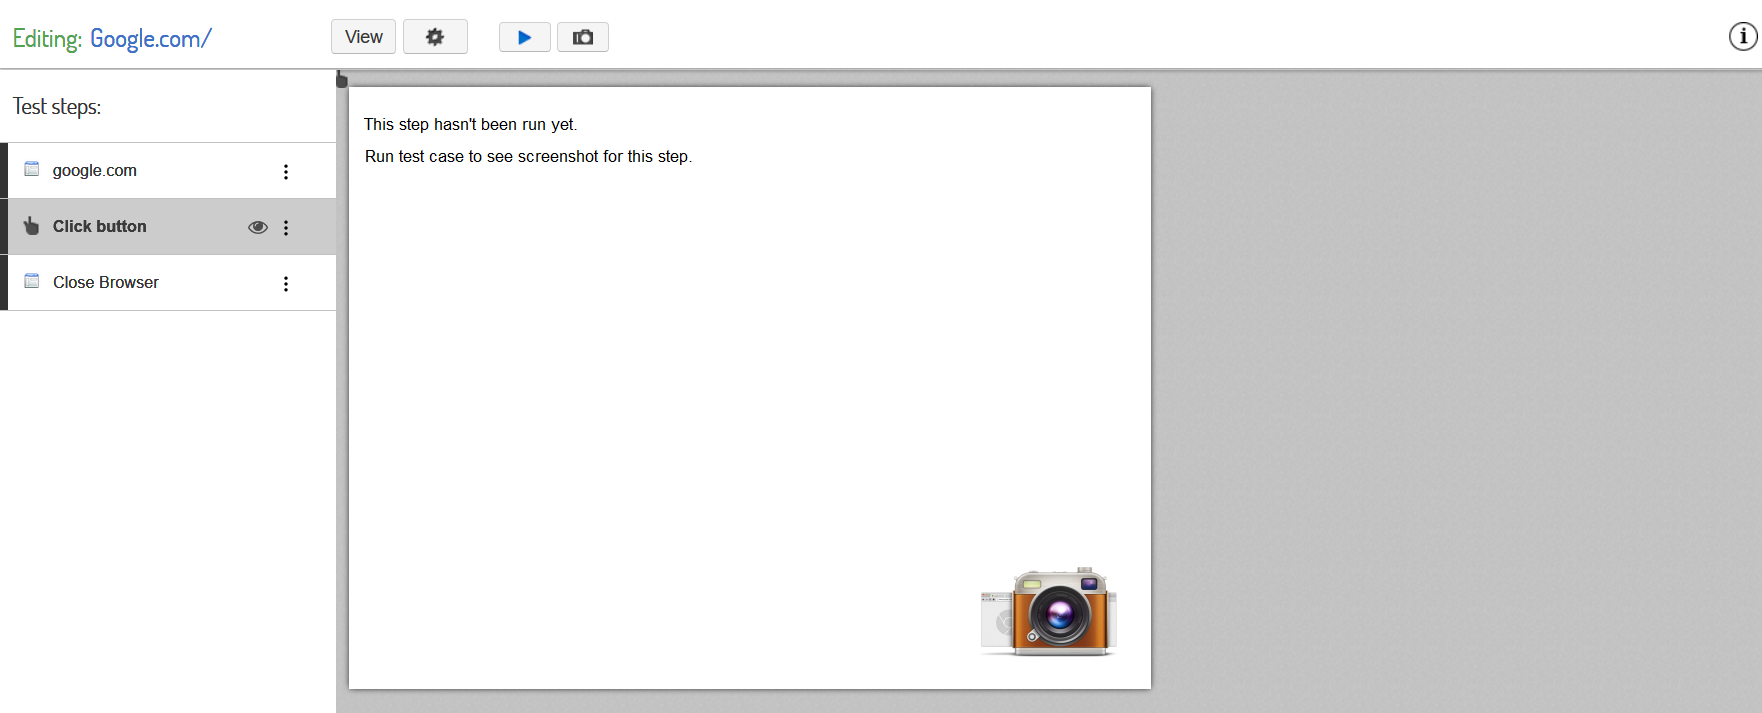
Due to the fact that you’re not recording anything, Screenster will only capture the UI baseline after you’ve created and run your test. In order to detect changes, you’ll need to rerun the test again.
Please visit the Release History page to check what is new and what has been improved in your current Screenster version.